Getting Started
Before you can begin, you must follow the First Time Setup guide to enable you to setup your development environment to work on the Entain Native Apps project.
Maestro Documentation
Please be sure to check the Maestro documentation.
The below getting started guide is a brief overview of the steps required to setup and run Maestro.
The Maestro documentation goes into more detail about each of the steps and provides more information about the tool.
Installing Maestro
iOS Dependencies
In order for Maestro to be able to connect to an iOS Simulator to run tests, you must install the the idb-companion package from Facebook.
brew tap facebook/fb
brew install facebook/fb/idb-companion
Installing the CLI
In the Entain Native Apps project, you can simply run the following command to install Maestro:
yarn maestro:install
Recommended Android Emulator Setup (optional)
Although not necessary, it's recommended that you configure an Android emulator specifically for Maestro that matches what we use on the CI. This will help you avoid failures due to device differences such as screen size, API Level, etc.
Click to expand
Assuming you have installed and setup Android Studio from the First Time Setup guide:
Open Android Studio.
Open the
Virtual Device Managervia the ellipses menu on the welcome screen of Android Studio.Click
Create Device.Select
Pixel 6 Proor the latest available Pixel device in the list, as the device.
Select
Tiramisu(API Level 33 / Android 13) as the system image.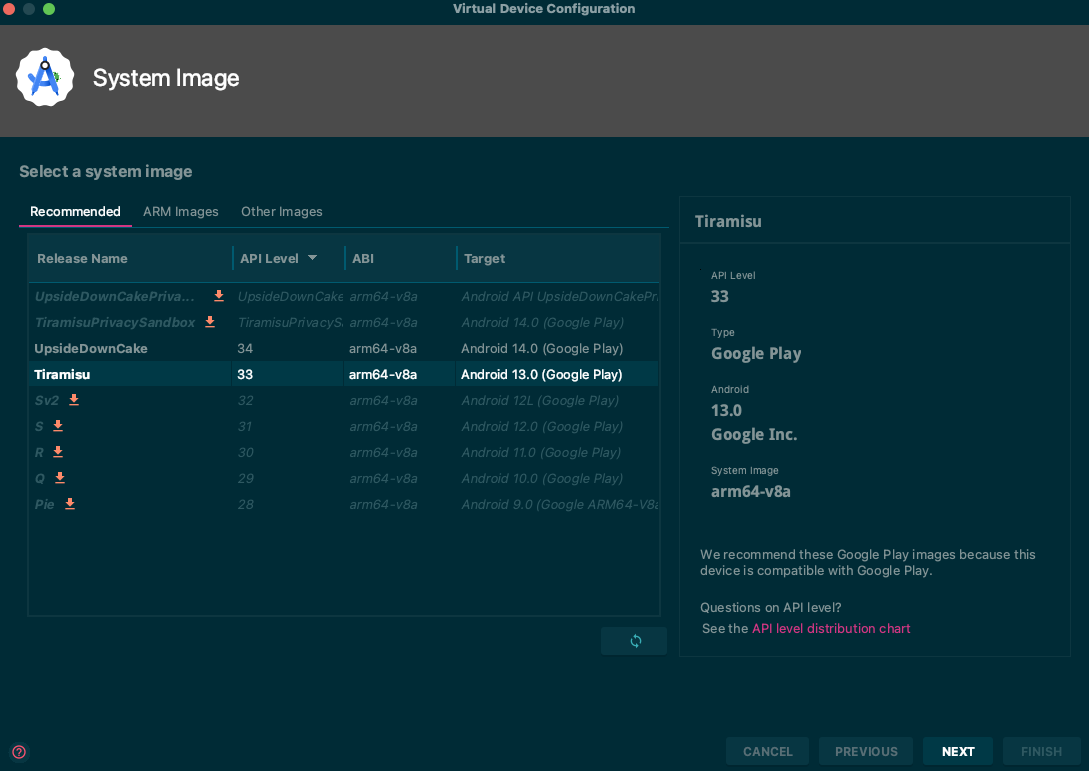
Click
Nextand click theShow Advanced Settingsbutton.Set the internal storage to
5Gb, then clickHide Advanced Settings.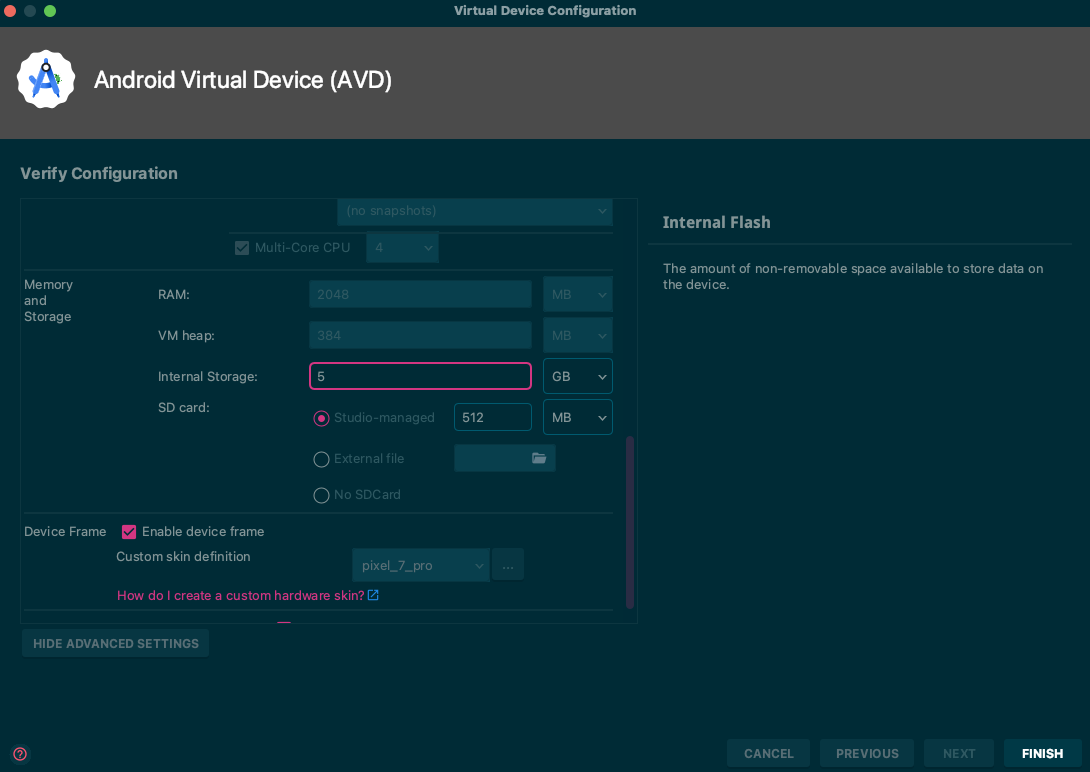
Give the device a name such as
Maestro.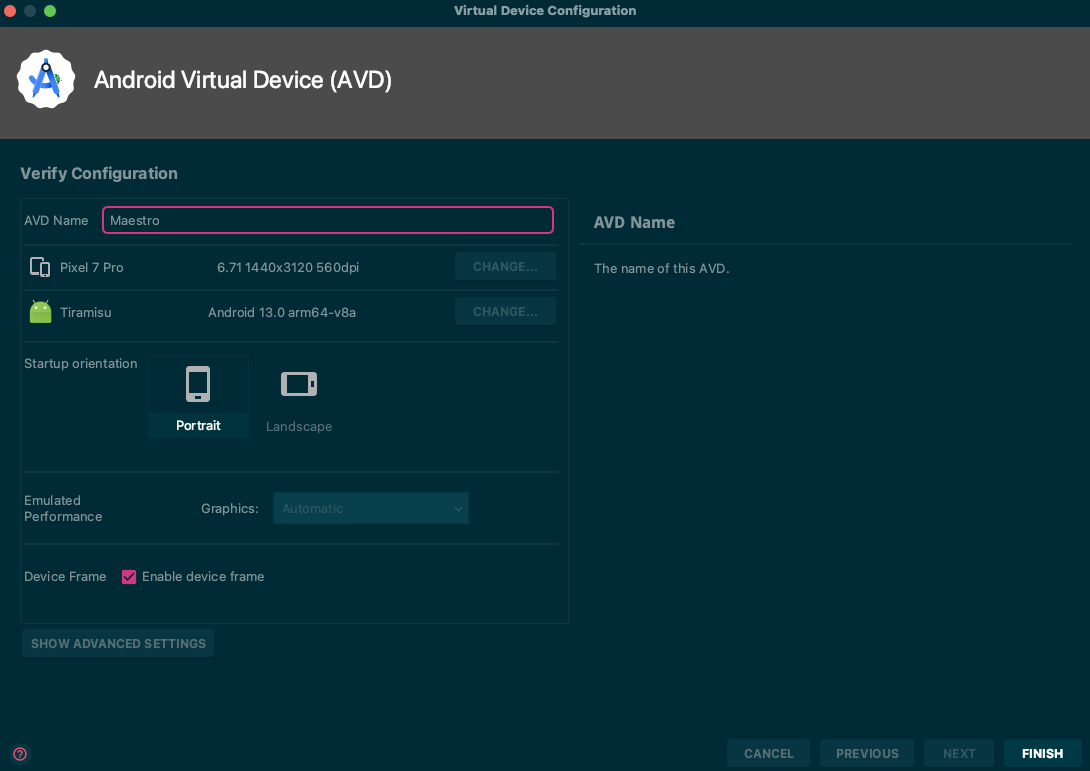
Leave all other settings as default and click
Finishto create the device.
Running Tests
This section will take you through the steps needed to run Maestro tests locally.
Step 1: Ensure Node dependencies are installed
In a new terminal instance, run the following command:
yarn
iOS Dependencies
Additionally - if you need to run E2E tests for iOS, be sure to also install the CocoaPods dependencies by also running the following command:
yarn pod:install
Step 2: Start the Metro bundler for React Native, with E2E files enabled
In the terminal instance, run the following command:
yarn e2e:<brand>
This will start the Metro Bundler in "E2E mode" for the specified brand (e.g.
ladbrokes, neds, tabnz).
This is done by passing the RN_SOURCE_EXTENSIONS=e2e.ts,e2e.tsx,dev.ts,dev.tsx
argument to the react-native start command, which tells the bundler to use files
with those file extensions before using the standard .tsx and .ts. This
means we can use E2E specific files to assist in mocking and standardising our
environment.
Step 3: Build and Run the App, with E2E testing enabled
In a new, separate terminal instance, run the following command:
yarn run:e2e:<platform>:<brand>
Installs the app on the target device for the specified platform and brand. The
key difference to the regular yarn <platform> commands is setting the
ENVFILE which controls some E2E specific behaviour within the app.
Step 4a: Running an individual test
To run a specific test flow for a brand, you can run the following command:
yarn test:e2e:<platform>:<brand> <relative-path-to-test-yaml-file>
platform can be either ios or android.
brand can be either ladbrokes, neds, tabnz.
relative-path-to-test-yaml-file is the path to the test file you wish to run.
This command is responsible for injecting important variables such as BRAND
and APP_ID used extensively throughout the tests. If you choose to manually
run the maestro test command for any reason, you will need to ensure you pass
these variables in yourself.
Step 4b: Running a suite of tests via a tag
To run several different tests at once, you can use the tag argument to run
all tests that have been tagged with it.
yarn test:e2e:<platform>:<brand>:tag "<tag-names-from-yaml-files>"
This command runs tests which include the specific tags you pass for example to run all sanity tests for the Ladbrokes brand, on the Android platform, run:
yarn test:e2e:android:ladbrokes:tag "sanity"
Further Help
For E2E and Maestro related conversation/questions, reach out to the #chapter-native-e2e-testing channel on Slack.