Writing Tests
Methodology and Mindset
E2E tests at their core should be reliable, independent and goal driven:
- Each test should aim to pass 100% of the time, regardless of outside factors (Eg. Environment issues, time of day affecting product availability, etc.). Flake, whilst not desired, is an expected facet of E2E that should be minimised whenever possible.
- Setup actions should always be performed at the start of the test, acting as both an initialisation phase for a test, as well as a teardown/cleanup for previously run tests. We should never rely on teardown actions at the end of a test as failed tests will not execute any teardown that exists past the point of failure. Don't assume that you are writing a test with a clean state each time it is run; consider states that the test can begin with based on previous test states and forcibly provide the conditions you require for your test to succeed.
- Your test should be accomplishing a predetermined goal, be it a happy path or error case, and where it is possible you should be avoiding all other unnecessary processes that add an additional point of failure to your test. If your test requires a certain state to begin, do as much as you can to enforce this state through the use of non-user actions (API, store, etc.), to increase reliability and reduce flake.
- Tests should live in their respective domain folder inside of
/e2e/tests. For example, group mode tests should live inside/e2e/tests/group-mode.
Maestro Launch Screen
When running E2E tests, this is the first screen you are presented with:
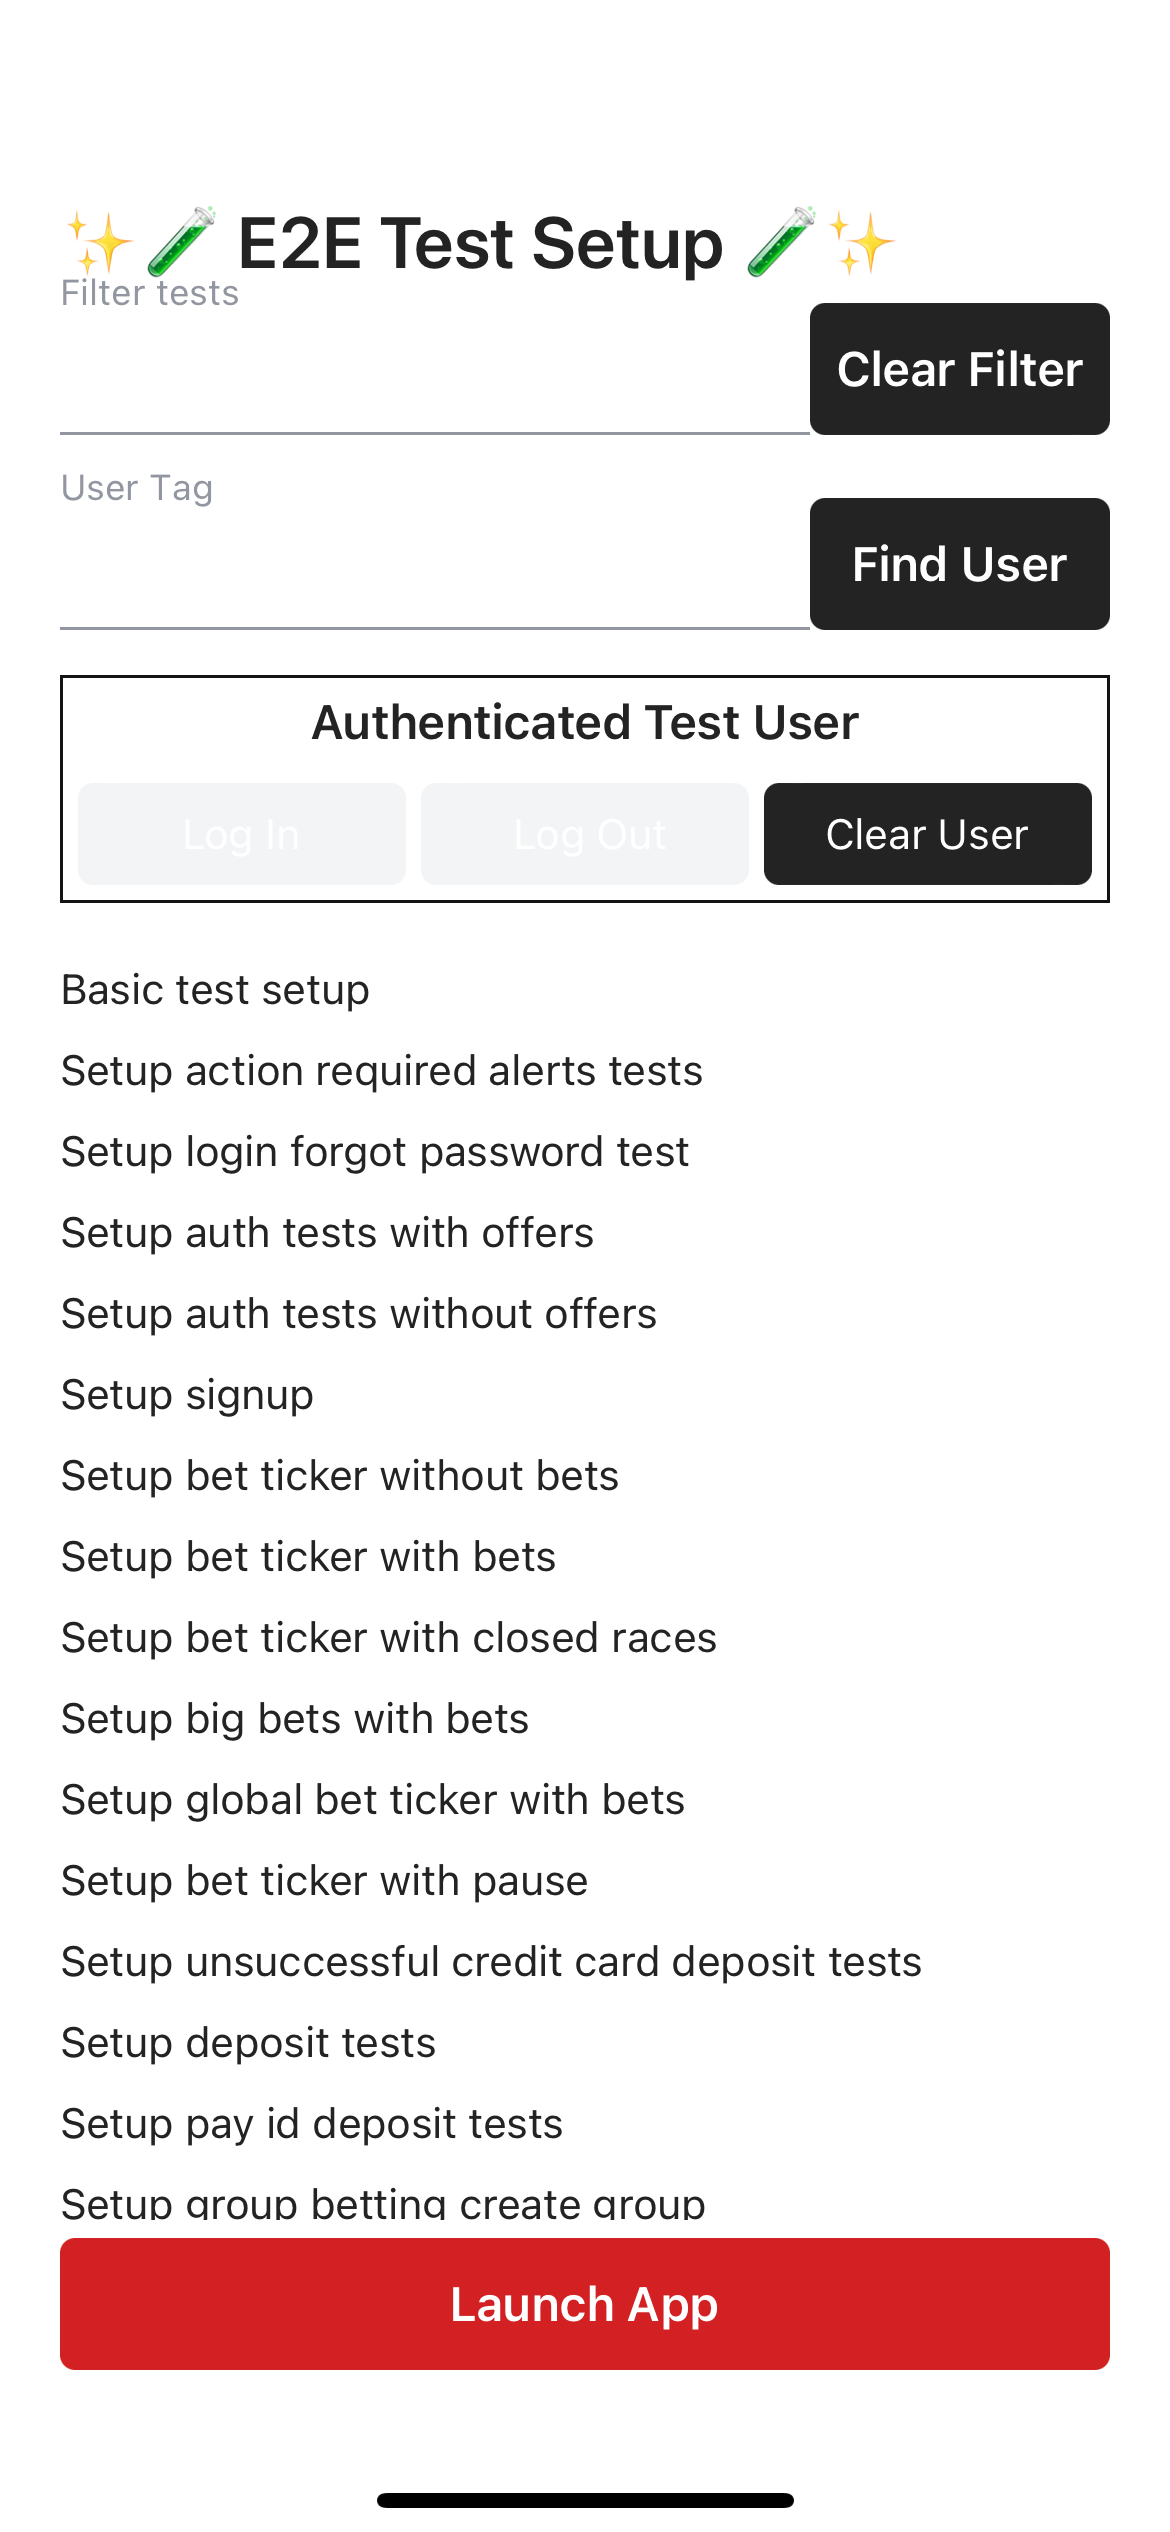
You won't need to interact with this screen.
This screen is responsible for executing your test setup script, which handles any app state updates and other logic necessary to run your test. To create new setup functions and have them accessible from within the launch screen, you can create a function within the test-setup.ts file of your test's domain. For example, the function below would go inside /e2e/tests/group-mode.
Test Setup
Setting up a new maestro test or flow involves creating a new .yaml file, see the Test Template on what this should include. From there, you will most likely need the runFlow command to run the launch flow which is responsible for interacting with the launch screen, running your Setup Actions and authenticating the Test User.
Setup Actions
const groupModeTestSetup = async (): Promise<void> => {
  // basic actions
};

export const GroupModeTestsSetup = {
  ...
  groupModeTestSetup,
};
If you are creating a new domain, you will need to add your setup function to the setup-actions.ts file, which is located in the root of the /e2e/utils/setup folder.
const testSetupActions = {
  ...
  ...GroupModeTestsSetup,
};
Your setup action will now list, if it's not, restart your server and/or simulator. It can now be run by passing the function name as the SETUP env variable from the launch flow. See below.
appId: ${APP_ID}
---
- runFlow:
    file: <relative-path>/flows/launch.yaml
    env:
      SETUP: groupModeTestSetup
      ACCOUNT_TAG: GROUP_MODE_CREATE_GROUP
Core APIs for test setup
In order to set up the correct test data for our automation tests, we can use the admin core apis (Cerburus) to modify user accounts prior to the test run. Some examples of these can be seen in these files:
- https://git.neds.sh/technology/code/ui/react-native/-/blob/main/e2e/utils/setup/api-core/punter-assist.ts
- https://git.neds.sh/technology/code/ui/react-native/-/blob/main/e2e/tests/punter-assist/test-setup.ts
Test Users
Inside e2e/fixtures/constants/users you will find 4 .json files. These files contain the credentials for the test users for each brand and platform. For eg.
  {
    "username": "Tyler1639463863407",
    "password": "not1Password",
    "clientId": "020f9b13-4677-4ffc-bc73-d6cc3989ef15",
    "tag": "DEPOSIT_CARD_USER"
  },
Their tag property can be passed as the environment variable ACCOUNT_TAG within tests and flows to authenticate them on launch.
env:
  ACCOUNT_TAG: DEPOSIT_CARD_USER
You must pass a different user to each file. For us to be able to run tests in parallel, we need to ensure that each test is using a unique user otherwise tests can fail due to the user being logged in elsewhere.
Where to Find New Test Users
Within this spreadsheet you will find available test users for Ladbrokes and Neds. When choosing a user, check if it has already been added, then add to the respective fixture file, then highlight and note the tag and platform it was added for on the spreadsheet.
Using the Test User in Setup Actions
To access the test users' details within your test setup actions, you will need to use the getTestCredentials function below.
const { username, password, clientId } = getTestCredentials('DEPOSIT_CARD_USER');
Authenticating Through the UI
Here we have 2 helper flows depending on this situation.
- If you working within the Punter Assist domain for example, you might need to login with your current test user again. Here you can use the
e2e/flows/login-with-last-launch-user.yamlflow which will assist. At the time of launch, the users details were captured and assigned into the globally availableoutputobject. You will simply call the flow like so:
- runFlow: <relative-path>/flows/login-with-last-launch-user.yaml
You can also access the test user's username, password and clientId inside the app as well by using the output object. For example:
output.constants.user.username
// or
output.constants.user.password
// or
output.constants.user.clientId
- Otherwise you might need to test logging a user in through the UI. Here you can use the
e2e/flows/login.yamlflow. This flow utilises thee2e/flows/user-login.jsscript and needs the environment variableUSER_LOGIN_ACCOUNT_TAGpassed to the login flow. We should only add users to this script if they are explicity needed for actions within the UI. For example:
- runFlow:
    file: <relative-path>/flows/login.yaml
    env:
      USER_LOGIN_ACCOUNT_TAG: GROUP_MODE_CREATE_GROUP
Extra
Common Custom Flows
- For a list of our common flows, see Common Custom Flows to Use.
Common Custom Scripts
- For a list of our common scripts, see Common Custom Scripts to Use.
Common Maestro Commands
- For a list of common commands, see Common Maestro Commands.